
Petits Gateaux
- julia cariati
- Aug 11, 2025
- 3 min read

🥐 Back to French Pastry School: Week 3 – Petit Gâteaux!
We’re back for another week at French Pastry School, and we’ve officially made it to week three—one of my absolute favorites! 🎉
This week was all about mastering the art of petits gâteaux: those gorgeous, individual-sized entremets (a fancy word for multi-layered desserts). We dove into everything from sponge cakes and mousses to fruit fillings, crunchy inserts, and the all-important final glaze.
Let’s break down the key components of a petit gâteau and go over some tips to help you build—and glaze—your own little masterpieces!
🍰 Step 1: The Base – Sponge Layers
Every petit gâteau starts with a sponge base that gives the dessert structure and just the right bite. There are several types to choose from, depending on the texture and flavor profile you're after. Some examples and kinds we used in class:
Génoise: Light and airy, made without chemical leaveners.
Joconde: Almond-based and super flexible—perfect for wrapping around molds or lining the sides of an entremet.
Pain de Gênes: Also almond-based, but made with marzipan (almond paste) for a bit of a denser crumb.
🍫 Step 2: The Mousse
Next comes the mousse—this is the creamy, flavorful heart of your dessert. There are many ways to make mousse, and the method you use depends on how firm you need it to be.
Here are a few types to know:
Whipped cream mousse: Light and simple, but not very stable on its own.
Fruit mousses: Often need gelatin or pectin to help them hold their shape.
Cooked meringue-based mousses: Super stable and great for incorporating flavors like melted chocolate, caramel or an infused cream!
No matter the type, the goal is to create something smooth and airy that can be layered neatly and hold up once molded.
🍓 Step 3: Inserts – The Surprise Inside
In my opinion, this is the most exciting part of the dessert!
Inserts are the layer that surprises you when you take that first bite—packed with flavor and texture, they pull the whole dessert together. Depending on your flavor profile, you’ve got options:
Compotes, gelées, or curds: Best for lighter, fruit-forward gâteaux.
Crunchy layers: Think shortbread, feuilletine, or nut praline—ideal for rich, creamy flavor combos like chocolate and hazelnut.
A well-chosen insert adds that contrast of texture and sharpness that makes a petit gâteau truly unforgettable.
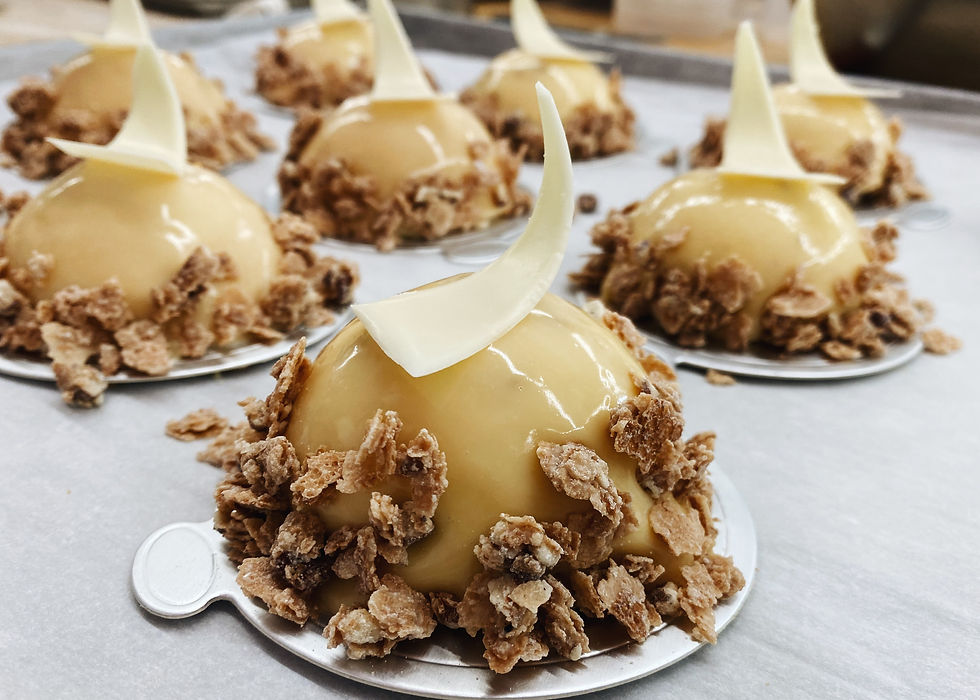
✨ Step 4: The Glaze
You’ve built all your layers, the mousse is set, and your petit gâteau is frozen solid and ready to shine... it’s glaze time! 🪩
A good mirror glaze is smooth, shiny, and beautifully reflective—but it takes precision:
Temperature is everything: Aim for 32–35°C (90–95°F).
Too cold? It won’t pour smoothly.
Too hot? It’ll be too runny and could melt your mousse on contact. 😬
Strain before you glaze: This helps remove any undissolved gelatin bits or lumps for a silky finish.
Pour in one smooth motion: Start from the center and work your way out—resist the urge to touch it afterward!
🎉 Final Thoughts
And that’s a (very condensed!) look at our petit gâteau week in pastry school. With all these layers—sponge, mousse, insert, and glaze—you’re building flavor, texture, and elegance all in one bite-sized dessert.
Armed with all this knowledge and insight, you’ll be on your way to crafting your own stunning petits gâteaux in no time. ✨
Happy baking! 😊


Comments